

Online courses directory (10358)

Modern Project Management – Managing Quality Control, Risk, Procurement and Project Closeout is the last in a series of free online courses designed for anyone who wants to learn about contemporary project management. This course is broken down into four key areas: how to implement the appropriate quality control procedures throughout the project life-cycle, how to assess risks to the project, how to set up and run an efficient and effective project procurement system, and finally how to close out the project successfully. The course shows learners why rigourous implementation of quality control is a very important aspect of project management. Both the project manager and the project team must implement a quality control system that inspects all outputs from the project processes and procedures, and ensure that they are aligned with the project scope. The quality control system must also ensure that the project management system itself is performed to a high standard and is audited and adjusted as required. The course also describes why the project manager and the project team must be risk aware - They must be capable of identifying and quantifying the known risks, and then deciding what mitigating strategy to use for each. As project phases are completed new risks will emerge and the project team must ensure that the risk plan and contingency funding are kept up to date. The course explains how the project manager also has to oversee the procurement process where goods and services are sourced from third parties. The project manager must ensure that the relevant contracts with suppliers are in place and that each supplier meets all the necessary requirements. The final part of the course explains how a project manager oversees the successful closure of a project, from gathering all the key statistics and summarising them, to closing out the supplier contracts, and archiving all the key documents. Possibly the most important part of project closure is the post-project review where the lessons learned are identified for the future. This is usually followed by the end of project celebration where the effort of the project team is acknowledged and rewarded. This course will be of great interest to project management professionals who would like to learn more about managing quality control, risk, procurement and project closeout. It will also be of interest to learners who would like a career in project management or learners who just want to be able to manage personal projects more effectively.<br />

Underestimating project complexity is widely accepted as one of the major causes of project failure. Based on international benchmarking activities (Merrow, 2010), we know that an average of 40% of projects do not deliver what they promised; for megaprojects in the oil and gas industry this figure is even worse (Ernst&Young, 2014).
As with most external factors, many of the causes and consequences of complexity are difficult to avoid or control. When dealing with complexity, standard practices in the field of project management often overlook the inherent uncertainties linked to the length and scale of engineering and infrastructure projects and their constantly changing environments. The situation is exacerbated by rapidly evolving technologies and social change.
Attempts to overcome these challenges by simply trying to reduce their causes is not enough.
In this course, you will learn our approach to mastering complexity, focused on front-end development and teamwork, which will help you develop the skills you need to make timely actions in order to tackle complexities and improve your chances of project success. You will learn how to enhance your own capacities and capabilities by ensuring you have the necessary balance of complementary skills in your team.
Project success starts with recognizing the main drivers of complexity, which can be highly subjective and highly dynamic. In this course, you will learn to identify what makes a project complex and how to perform a complexity assessment.
Examining the elements of a project (such as interfaces, stakeholders, cultures, environment, technology, etc.) and their intricate interactions is key to mastering complexity.
You will analyze these elements in the context of your own project. Then, based on our complexity framework, you will identify the complexity footprint of your project and use it to adapt your management processes. With personalized guidance and feedback from our world-class instructors, you will learn how to recognize what competencies you need to develop and how to adapt your management style accordingly, not only to improve project performance but also to enhance your decision-making capacity.
This course has been designed by TU Delft’s international experts on Project Complexity, and is based on more than 60 years of practical experience as well as relevant research in the field. “We see projects still fail and there is a need to do things differently. That’s what this course is about: delivering the best practices for project execution based on our state-of-the-art research.” – Professor Hans Bakker.

This course combines the essential elements of Project Management and Team Leadership into one course. Through class engagement and reflection, you will acquire further understanding of the responsibilities of leadership and become better prepared to apply this knowledge to the project environment.

This course is for students interested in studying the Project Maths Higher Level Course in its entirety. This free online course provides students with videos on all the Higher Level topics in one location listed by module and topic. In addition, a comprehensive assessment is provided which tests learners on the entire content of the Project Maths Higher Level Syllabus. These topics include Probability and Statistics, Geometry and Trigonometry, Numbers and Shapes, Algebra, Functions and Calculus.<br />

This course is for students interested in studying the Project Maths Ordinary Level Course in its entirety. This free online course provides students with videos on all the Ordinary Level topics in one location listed by module and topic. In addition, a comprehensive assessment is provided which tests learners on the entire content of the Project Maths Ordinary Level Syllabus. These topics include Probability and Statistics, Geometry and Trigonometry, Numbers and Shapes, Algebra, Functions and Calculus.<br />

This finance course will begin by exposing learners to the critical role risk plays in evaluating projects.
This course will involve detailed exposure to statistical modeling and data analytics to measure the different drivers of value creation and appreciate how companies should make decisions in the real world. While no theory is perfect, this course will provide time-tested foundational aspects of risk important to understanding the value of projects.
This course is targeted to managers working in corporations or institutions and individuals planning to pursue a graduate degree in business (MBA).
This course is the second of four in the Corporate Financial Analysis XSeries. It is a logical follow-up to the first course, “Financial Decision Rules for Project Evaluation,” you will learn how to conduct risk analysis of different projects using both conceptual and practical developments in modern finance.

Project Strategy and Integration

A successful new-media marketing strategy projects your brand promise in the marketplace.

Use what you learn in this course to understand how your firm is communicating its brand promise, and take concrete steps to ensure you are being consistent in your messaging.

Rediscover the most important observations in history. Discovery of Magnetism. Compass: which way is north?. Floating Magnet. Compass Build (stroke direction). Compass Build (magnet orientation). Neutralize a Compass. Compass Interactions. Magnetising materials. What's Next?. Magnet near Compass. Tracing a Magnetic Field. Tracing a magnetic field. Discovery of Magnetic Fields. Magnet and iron filings. Magnetic field. 3D magnet with field. Magnetic Permeability. Increase Strength of Magnet. What's Next?. Are 2 magnets stronger than 1?. Measure the Earth!. Earth's Magnetic Field (how to measure). Force over Distance. Inverse Cube Law (deflection method). Inverse Square Relationship. Inverse Cube Law (Method of Oscillation). Zinc Copper cell (reduction-oxidation). How to Measure?. Battery Meter (Galvanometer). How Many Turns?. Electrolyte Test (pure water vs. vinegar). Reverse Electrodes (polarity). Electrolyte (strong acid test). Electrolyte (salt test). Electrode (distance test). Electrolyte (temperature test). Electrode (surface area test). Standard Cell. How much electrolyte does a single cell need?. What's Next?. Discovery of Electromagnetism. Experiment: Electromangetism. Electromagnetic Field (above vs. below). Electromagnetic Field (forward vs. reverse). Electromagnetic Field (loop). Right-Hand Rule. Battery Meter (Galvanometer). Series Load. Pencil Resistor. Variable Resistor (Pencil). Listen to Variable Resistance. What's Next?. Electromagnet (construction tip). Electromagnet (penny powered). Understanding Force. Spinning Compass. Build your own motor. What's Next. Discovery of Triboelectric effect. Pith Ball Electroscope. Foil Leaf Electroscope. What's Next?. Discovery of Magnetism. Compass: which way is north?. Floating Magnet. Compass Build (stroke direction). Compass Build (magnet orientation). Neutralize a Compass. Compass Interactions. Magnetising materials. What's Next?. Magnet near Compass. Tracing a Magnetic Field. Tracing a magnetic field. Discovery of Magnetic Fields. Magnet and iron filings. Magnetic field. 3D magnet with field. Magnetic Permeability. Increase Strength of Magnet. What's Next?. Are 2 magnets stronger than 1?. Measure the Earth!. Earth's Magnetic Field (how to measure). Force over Distance. Inverse Cube Law (deflection method). Inverse Square Relationship. Inverse Cube Law (Method of Oscillation). Zinc Copper cell (reduction-oxidation). How to Measure?. Battery Meter (Galvanometer). How Many Turns?. Electrolyte Test (pure water vs. vinegar). Reverse Electrodes (polarity). Electrolyte (strong acid test). Electrolyte (salt test). Electrode (distance test). Electrolyte (temperature test). Electrode (surface area test). Standard Cell. How much electrolyte does a single cell need?. What's Next?. Discovery of Electromagnetism. Experiment: Electromangetism. Electromagnetic Field (above vs. below). Electromagnetic Field (forward vs. reverse). Electromagnetic Field (loop). Right-Hand Rule. Battery Meter (Galvanometer). Series Load. Pencil Resistor. Variable Resistor (Pencil). Listen to Variable Resistance. What's Next?. Electromagnet (construction tip). Electromagnet (penny powered). Understanding Force. Spinning Compass. Build your own motor. What's Next. Discovery of Triboelectric effect. Pith Ball Electroscope. Foil Leaf Electroscope. What's Next?.

Khan Academy's Discovery Lab Offers Hands-On Learning. Khan DL Week 3 - Vannesa, Melvin & Greta. Khan DL Week 2 - Philip and Miles. Khan DL Week 2 - Arshia. AntBots in action. Khan Academy's Discovery Lab Offers Hands-On Learning. Khan DL Week 3 - Vannesa, Melvin & Greta. Khan DL Week 2 - Philip and Miles. Khan DL Week 2 - Arshia. AntBots in action.

Discovery Lab Overview. Monty Hall. Icosahedron. Lemonade Stand. Magician's Guess. Bridge Building. Explore Instructor Reflections. Lego Sumo Robots. Rube Goldberg. Spout Bot Innovation. Spout Bot Build. Spout Comes Alive. Spout Instructor Reflections. Build Up to Bridge Testing. Exhibition Day. Discovery Lab Overview. Monty Hall. Icosahedron. Lemonade Stand. Magician's Guess. Bridge Building. Explore Instructor Reflections. Lego Sumo Robots. Rube Goldberg. Spout Bot Innovation. Spout Bot Build. Spout Comes Alive. Spout Instructor Reflections. Build Up to Bridge Testing. Exhibition Day.

Ping pong ball launcher introduction. Build a ping pong ball launcher . Update and modify your ping pong ball launcher. Ping pong ball launcher introduction. Build a ping pong ball launcher . Update and modify your ping pong ball launcher.

Videos exploring the way things work. What is inside an alarm clock radio?. What is inside a coffee maker?. What is inside a tap light?. What is inside a hair dryer? (1 of 2). What is inside a hair dryer? (2 of 2). Compare the hair dryer motor to the one you can build. What is inside a DVD player? (1 of 5). What is inside a DVD player? (2 of 5). What is inside a DVD player? (3 of 5). What is inside a DVD player? (4 of 5). What is inside a DVD player? (5 of 5). What is inside a universal remote control?. What is inside a digital camera? (1 of 2). What is inside a digital camera? (2 of 2). What is inside an alarm clock radio?. What is inside a coffee maker?. What is inside a tap light?. What is inside a hair dryer? (1 of 2). What is inside a hair dryer? (2 of 2). Compare the hair dryer motor to the one you can build. What is inside a DVD player? (1 of 5). What is inside a DVD player? (2 of 5). What is inside a DVD player? (3 of 5). What is inside a DVD player? (4 of 5). What is inside a DVD player? (5 of 5). What is inside a universal remote control?. What is inside a digital camera? (1 of 2). What is inside a digital camera? (2 of 2).

Start your own robotics project with Spout, Spider, and Bit-zee!. 3rd graders build robots at Santa Rita Elementary School. Parts list for Spout. Tool list for Spout. Spout step by step PDF. See inside Spout's motors and switches. Spout 1. Spout 2. Spout 3. Spout 4. Spout 5. Spout 6. Spout 7. Spout 8. Spout 9. Spout 10. Spout 11. Spout OOP: with Maze. The goal of Spout. 1 Spout Introduction (with solder). 2 Attach Spout's lever switches and motors. 3 Attach Spout's wires and connectors. 4 Attach Spout's sliding switches and resistors. 5 Connect Spout's antenna. 6 Attach Spout's LED eyes. 6th graders learn to build a Spider robot. Fun with a Spider Bot. Parts list for Spider. Tools list for Spider. 1 Spider parts and tools. 2 Hacking Spider's click n' stick. 3 Creating the battery and motor mounts for Spider. 4 Attach Spider's click n' stick base to the batteries and thread his wires. 5 Attach Spider's motor controller and wire his motors. 6 Connect Spider's power switch and run the power wires to the motor controller. 7 Attach and adjust the Spider's bezel. 8 Attach Spider's wheels. 9 Make the connnectors for Spider's Arduino Nano. 10 Spider Connect the power and signal wires from the motor controller to the Arduino. 11 Attach Spider's LED eyes. 12 Connect Spider's stablizer bar. 13 Spider's Romance. 14 Teaching Spider to dance. 15 Ben Eater's Spider Bot. Parts for Bit-zee and It-zee. Tools for Bit-zee and It-zee. 1. Bit-zee. 2. Bit-zee (long version). 3. Bit-zee Bot Introduction. 4. Bit-zee planning and propulsion. 5. Bit-zee's bits. 6. Bit-zee's chassis/frame. 7. Bit-zee's wheel mounts and fenders. 8. Bit-zee's component mounting holes. 9. Bit-zee's batteries. 10. Improving the battery wires. 11. Connecting Bit-zee's power wires and on-off switch. 12. Bit-zee's motors. 13. Why does Bit-zee need a motor controller?. 14. Bit-zee's motor controller. 15. Attaching and wiring Bit-zee's motor controller. 16. Attaching Bit-zee's Arduino. 17. How to hotwire a digital camera. 18. Attaching Bit-zee's digital camera. 19. Bit zee's 5 Volt power distribution board. 20. Hacking and attaching a digital recorder/player to Bit-zee. 21. Making a power connector for the Arduino. 22. Attaching Bit-zee's prototype board. 23. Connecting the motor controller to the Arduino. 24. Connecting Bit-zee's camera to the Arduino. 25. Bit-zee's bumper switches. 26. Bit-zee's eyes. 27. Bit-zee's IR sensor. 28. Bit-zee's shell. 29. Camera wiring update. 30. Load the Code for It-zee and Bit-zee. 3rd graders build robots at Santa Rita Elementary School. Parts list for Spout. Tool list for Spout. Spout step by step PDF. See inside Spout's motors and switches. Spout 1. Spout 2. Spout 3. Spout 4. Spout 5. Spout 6. Spout 7. Spout 8. Spout 9. Spout 10. Spout 11. Spout OOP: with Maze. The goal of Spout. 1 Spout Introduction (with solder). 2 Attach Spout's lever switches and motors. 3 Attach Spout's wires and connectors. 4 Attach Spout's sliding switches and resistors. 5 Connect Spout's antenna. 6 Attach Spout's LED eyes. 6th graders learn to build a Spider robot. Fun with a Spider Bot. Parts list for Spider. Tools list for Spider. 1 Spider parts and tools. 2 Hacking Spider's click n' stick. 3 Creating the battery and motor mounts for Spider. 4 Attach Spider's click n' stick base to the batteries and thread his wires. 5 Attach Spider's motor controller and wire his motors. 6 Connect Spider's power switch and run the power wires to the motor controller. 7 Attach and adjust the Spider's bezel. 8 Attach Spider's wheels. 9 Make the connnectors for Spider's Arduino Nano. 10 Spider Connect the power and signal wires from the motor controller to the Arduino. 11 Attach Spider's LED eyes. 12 Connect Spider's stablizer bar. 13 Spider's Romance. 14 Teaching Spider to dance. 15 Ben Eater's Spider Bot. Parts for Bit-zee and It-zee. Tools for Bit-zee and It-zee. 1. Bit-zee. 2. Bit-zee (long version). 3. Bit-zee Bot Introduction. 4. Bit-zee planning and propulsion. 5. Bit-zee's bits. 6. Bit-zee's chassis/frame. 7. Bit-zee's wheel mounts and fenders. 8. Bit-zee's component mounting holes. 9. Bit-zee's batteries. 10. Improving the battery wires. 11. Connecting Bit-zee's power wires and on-off switch. 12. Bit-zee's motors. 13. Why does Bit-zee need a motor controller?. 14. Bit-zee's motor controller. 15. Attaching and wiring Bit-zee's motor controller. 16. Attaching Bit-zee's Arduino. 17. How to hotwire a digital camera. 18. Attaching Bit-zee's digital camera. 19. Bit zee's 5 Volt power distribution board. 20. Hacking and attaching a digital recorder/player to Bit-zee. 21. Making a power connector for the Arduino. 22. Attaching Bit-zee's prototype board. 23. Connecting the motor controller to the Arduino. 24. Connecting Bit-zee's camera to the Arduino. 25. Bit-zee's bumper switches. 26. Bit-zee's eyes. 27. Bit-zee's IR sensor. 28. Bit-zee's shell. 29. Camera wiring update. 30. Load the Code for It-zee and Bit-zee.

Thermo Can. Thermo Can.

This course is a project-based introduction to manipulating and characterizing cells and biological molecules using microfabricated tools. It is designed for first year undergraduate students. In the first half of the term, students perform laboratory exercises designed to introduce (1) the design, manufacture, and use of microfluidic channels, (2) techniques for sorting and manipulating cells and biomolecules, and (3) making quantitative measurements using optical detection and fluorescent labeling. In the second half of the term, students work in small groups to design and test a microfluidic device to solve a real-world problem of their choosing. Includes exercises in written and oral communication and team building.

This project is a low cost robot made from every day items that are taken apart and described in the reverse engineering section. 1. Bit-zee. 2. Bit-zee (long version). 3. Bit-zee Bot Introduction. 4. Bit-zee planning and propulsion. 5. Bit-zee's bits. 6. Bit-zee's chassis/frame. 7. Bit-zee's wheel mounts and fenders. 8. Bit-zee's component mounting holes. 9. Bit-zee's batteries. 10. Improving the battery wires. 11. Connecting Bit-zee's power wires and on-off switch. 12. Bit-zee's motors. 13. Why does Bit-zee need a motor controller?. 14. Bit-zee's motor controller. 15. Attaching and wiring Bit-zee's motor controller. 16. Attaching Bit-zee's Arduino. 17. How to hotwire a digital camera. 18. Attaching Bit-zee's digital camera. 19. Bit zee's 5 Volt power distribution board. 20. Hacking and attaching a digital recorder/player to Bit-zee. 21. Making a power connector for the Arduino. 22. Attaching Bit-zee's prototype board. 23. Connecting the motor controller to the Arduino. 24. Connecting Bit-zee's camera to the Arduino. 25. Bit-zee's bumper switches. 26. Bit-zee's eyes. 27. Bit-zee's IR sensor. 28. Bit-zee's shell. 29. Camera wiring update.
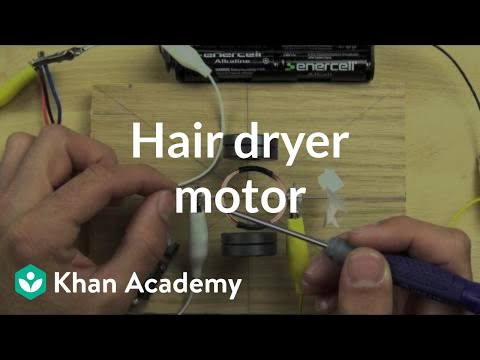
In this section we investigate how dc motors work and what is inside of them. Brushed DC motor explained. Build your own motor. Compare the hair dryer motor to the one you can build.
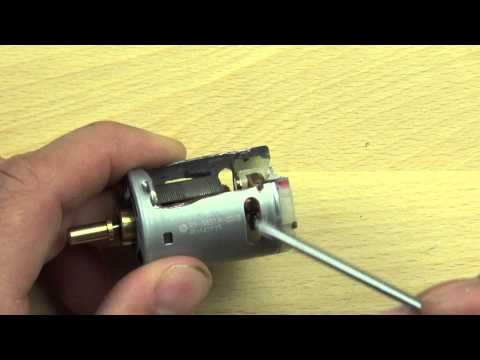
Brushed DC motor explained. Build your own motor. Compare the hair dryer motor to the one you can build.
Add to calendar

Trusted paper writing service WriteMyPaper.Today will write the papers of any difficulty.